Did you know that you can create texture in the shape of a fun stencil? Well, I am here to tell you that not only is it possible, it is also so much fun and I'll share with you how!
This technique is often referred to as "relief stenciling" or creating raised stencil effects. Once you see just how easy it is to do, I promise ... you will want to add texture to more of your crafting projects!
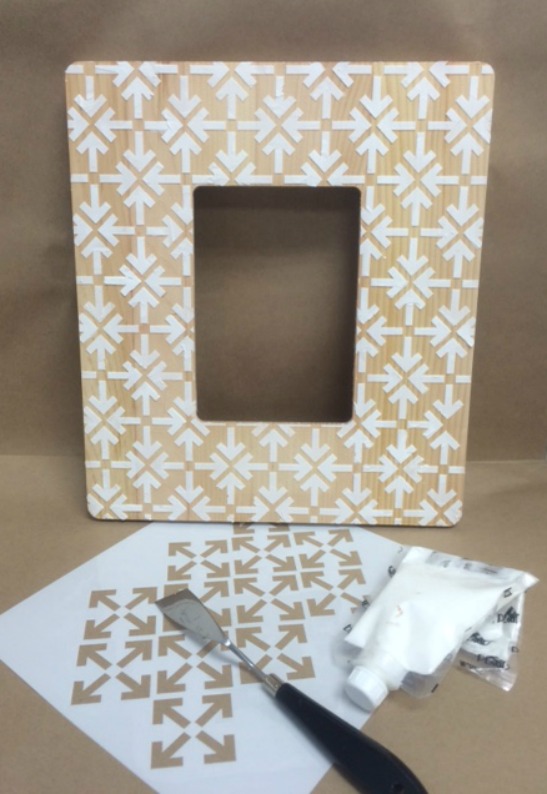
In the photo below, you can see how I "dressed up" a plain wood frame using Mod Podge Collage Clay and painted it with FolkArt Home Decor Chalk and then finished it off with FolkArt Home Decor Waxes. I LOVE the look of old embossed ceiling tile, don't you?
Want to see how it is done? Let's get started by gathering the necessary supplies.
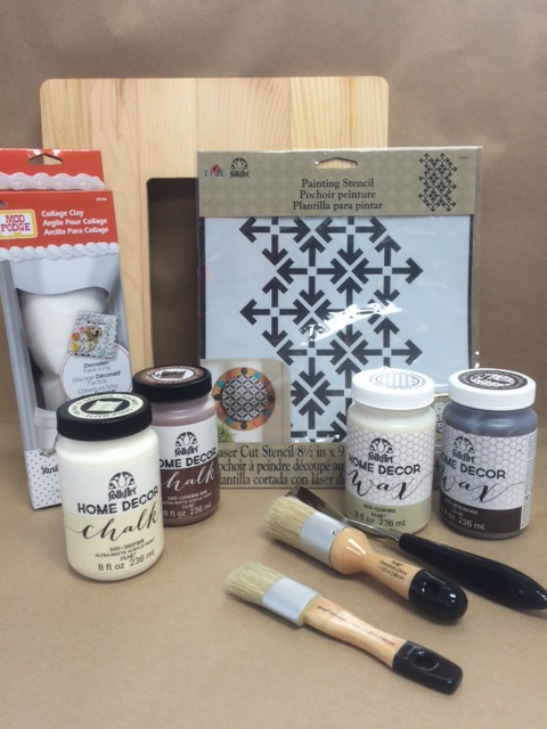
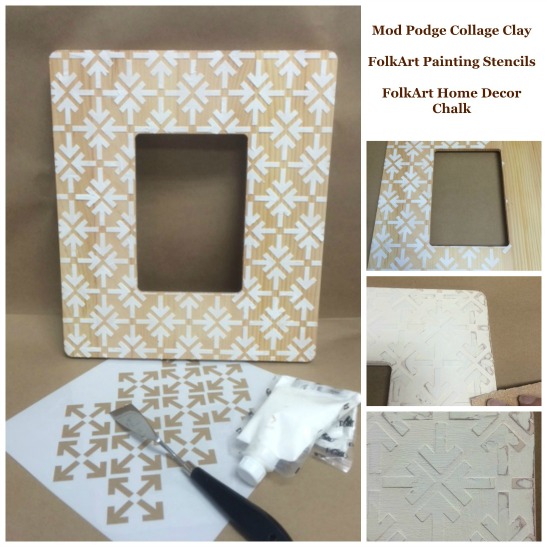
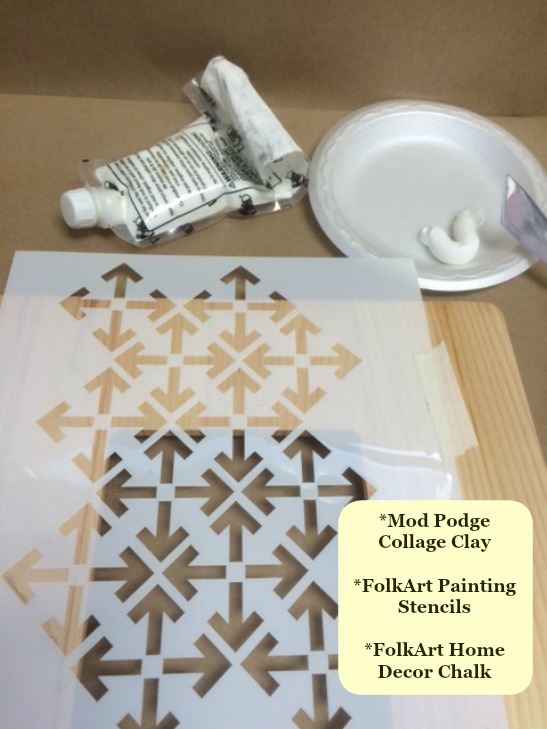
Gather These Supplies
- Wood Frame (or other smooth surface)
- Mod Podge Collage Clay - Vanilla White
- FolkArt Painting Stencil - Arrow Pattern
- FolkArt Home Decor Chalk - Cathedral Door and Sheepskin
- FolkArt Home Decor Wax - Clear and Antiquing
- FolkArt Home Decor Small Chalk and Wax Brush Set
- Miscellaneous Supplies: Brush Basin or Container for Water, Paper Towels, Foam Plate for palette, White Soft Lint-Free Cloth, Palette Knife, Medium Grit Sandpaper, 3/4" Flat Brush, Stencil Tape, Pencil and Ruler
How to Create a Relief Stenciled Frame
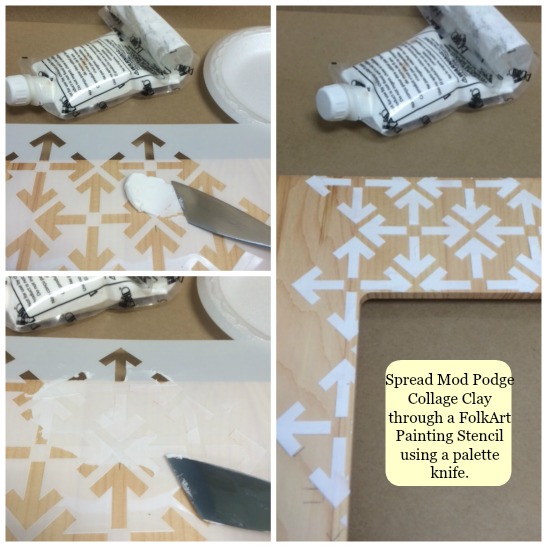
To begin, I positioned my stencil directly onto the unfinished wood frame starting in the center of the frame. TIP: Even though you will be creating an overall pattern, you may find it helpful to begin in the center so that the spacing is even on all sides. If so, use a pencil and ruler to locate and lightly mark the center. I used a couple pieces of stencil tape to hold my stencil in place.
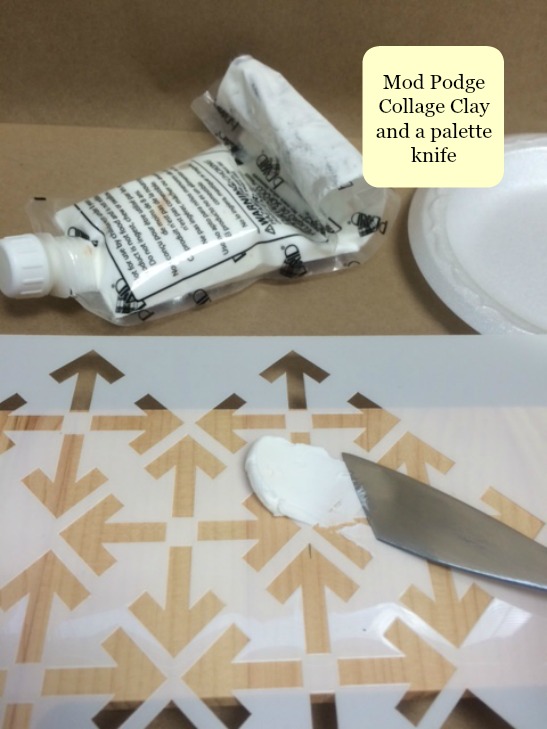
Once my stencil was in place, I squeezed a small amount of Mod Podge Collage Clay onto a foam plate palette. I then loaded my palette knife with some Collage Clay and smoothed it over the openings of the stencil design. TIP: If you do not have a palette knife try experimenting with a flexible squeegee or an old credit card or hotel room key card.
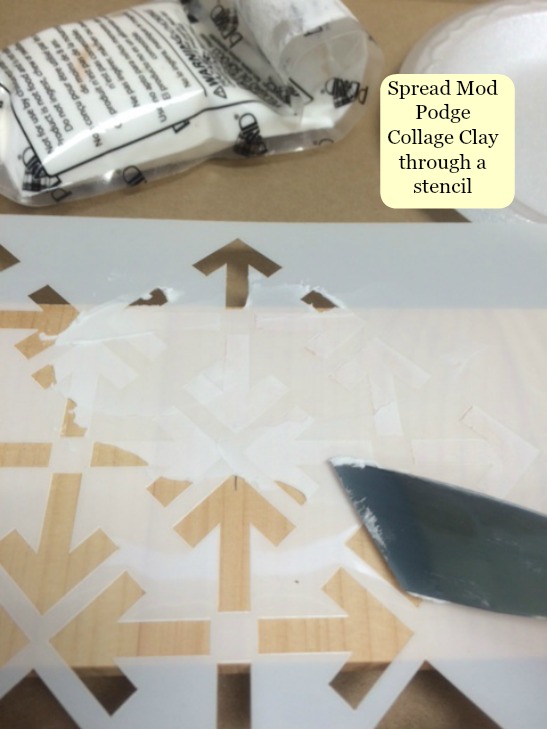
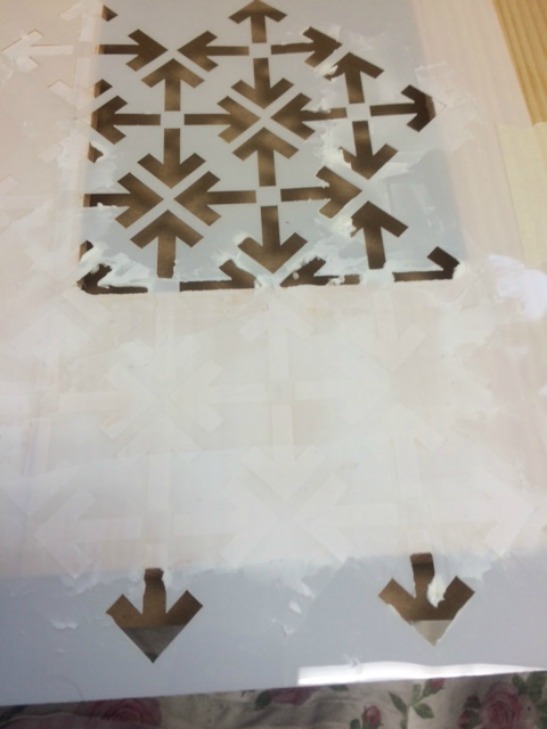
The stencil I was working with is approximately 7 ml thick so the Collage Clay is only applied to that thickness; because I knifed over the stencil when smoothing out the Collage Clay. Can you see how the Collage Clay is filling in the stencil design?
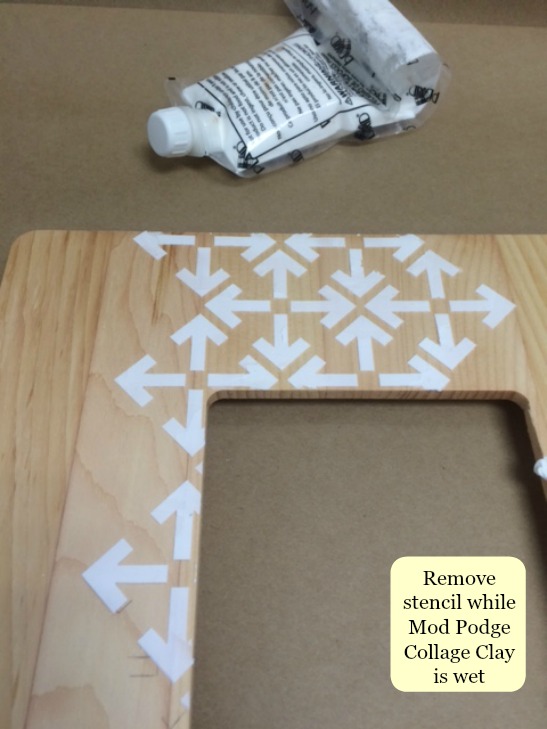
Once all exposed areas are covered with Mod Podge Collage Clay, carefully lift the stencil while the Collage Clay is still wet. TIP: Before continuing the dimensional design, check the backside of the stencil and clean it if needed. This step will prevent you from spreading any Collage Clay where it is not desired.
Continue by repositioning the stencil and repeating the application of Mod Podge Collage Clay through the stencil openings. TIP: When repeating an overall pattern, you may find it helpful to overlap the stencil openings with a section that already has been applied with Collage Clay. The Collage Clay will dry fairly quickly because the application is so thin, however, you will want to be careful when overlapping on wet Collage Clay.
You can see here that I simply continued repeating these steps adding more Mod Podge Collage Clay through the stencil; one side is done! Isn't this a cool stencil, kind of reminds me of the old embossed ceiling tile and/or cut sheet metal!
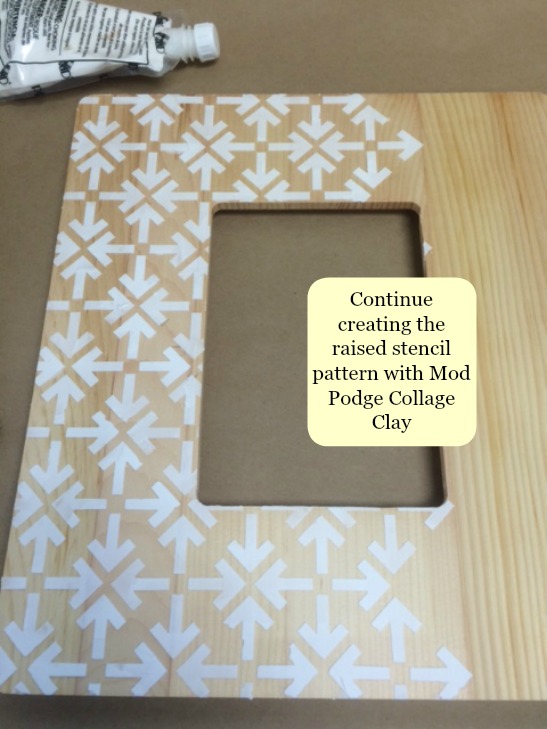
Continue until the entire surface has been embellished with this raised stencil effect and allow it to thoroughly dry.
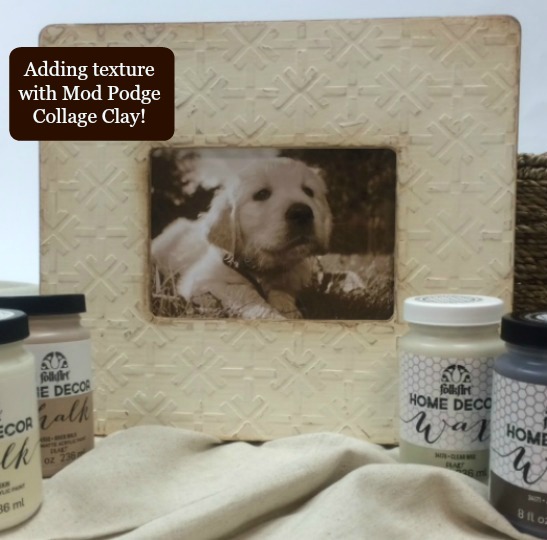
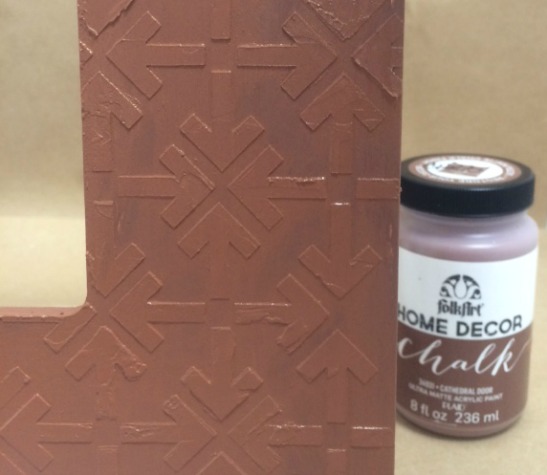
Once dry, next steps were to paint, wax and antique my project. I chose a two-color distress technique using FolkArt Home Decor Chalk, however, you can also leave it natural, apply a stain, or simply paint it a single color and call it a day! I basecoated the entire surface with Cathedral Door using my small FolkArt Home Decor Chalk brush and allowed it to dry.
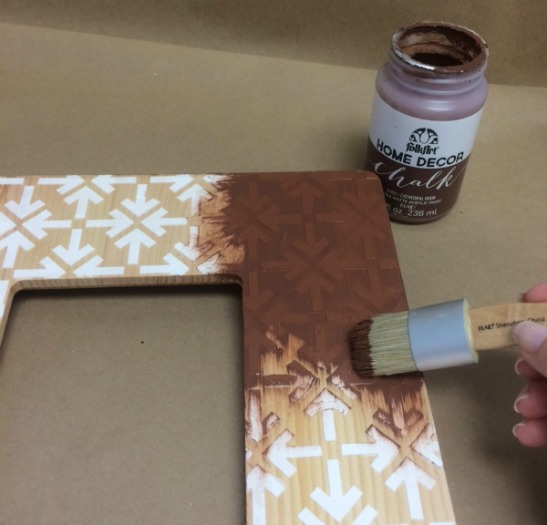
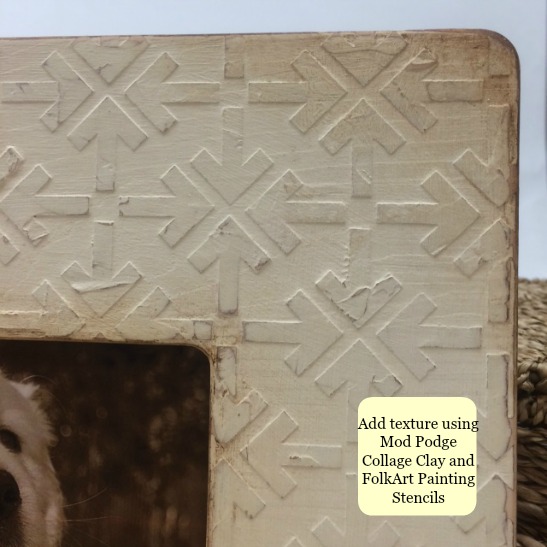
Here is a close up shot of the dimensional Collage Clay painted with Cathedral Door.
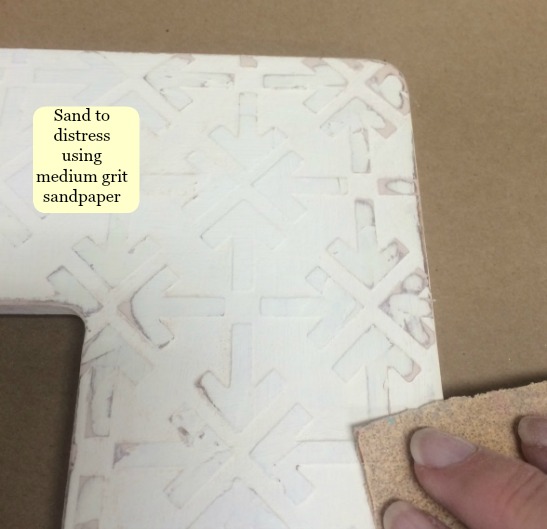
Second coat or top coat was Sheepskin.

I wanted my frame to be classic and old fashioned, so I used a medium grit sandpaper to distress both the inside and outside edges of the wood frame. I did distress heavier in some areas than others ... that is totally up to you.
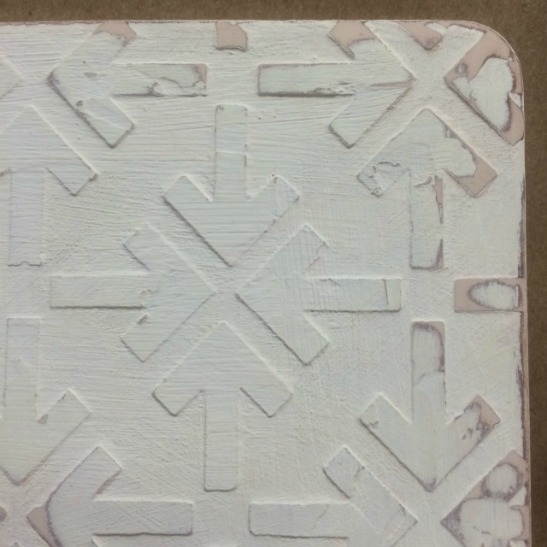
Here is a close up view of a corner where I heavily distressed and actually wore down a bit of the Collage Clay. Pretty cool, eh?
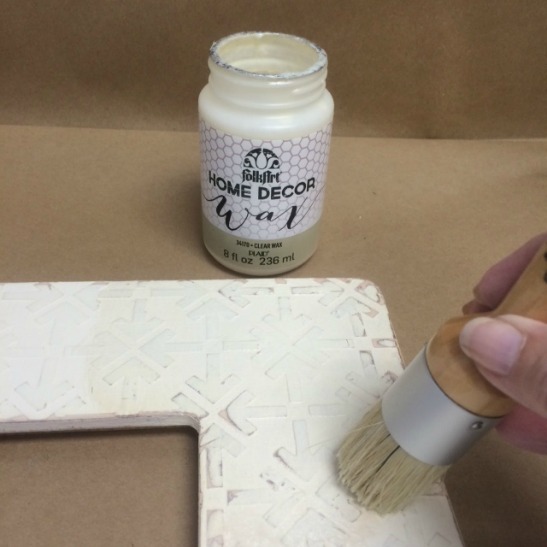
To seal and protect after removing any sanding dust, I then applied a coat of FolkArt Home Decor Clear Wax using my small wax brush. TIP: You will want to allow this application of Clear Wax to dry overnight. Of course, you may be happy with this stage of the project and simply buff the surface to your desired sheen.
However, I still wanted my frame to have that antiqued and aged appearance. So after buffing the application of Clear Wax, I then added a small amount of FolkArt Home Decor Antiquing Wax to the corners. To accomplish that, I double loaded a 3/4" flat brush with both Clear Wax and Antiquing Wax applying the Antiquing Wax to the edges. I then wiped the Antiquing Wax application with a soft cotton, lint-free cloth to blot it and softened the edges. TIP: If you do not have a 3/4" flat brush, you can also use the cotton cloth to apply the Antiquing Wax to the edges.
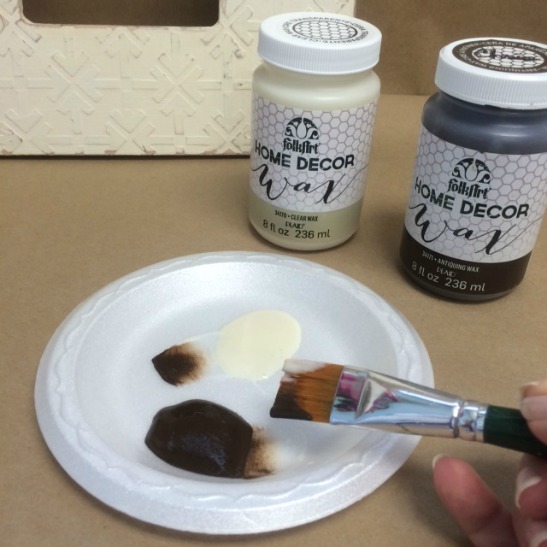
Here is a close up of the Antiquing Wax application along the frame edges.
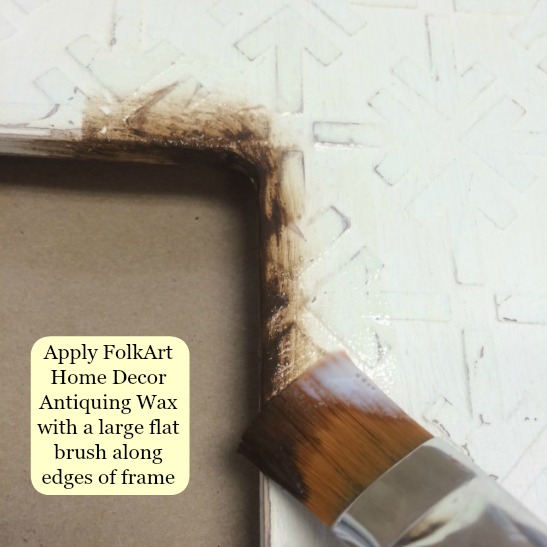
And here is a close up look at the Antiquing Wax after it has been softened with the cotton cloth. TIP: To add interest when antiquing, allow some areas to appear a bit darker than others ... notice the corner is darker than the straight edges.
Take a look at the final project one more time ... what do you think? Isn't this a pretty cool technique?
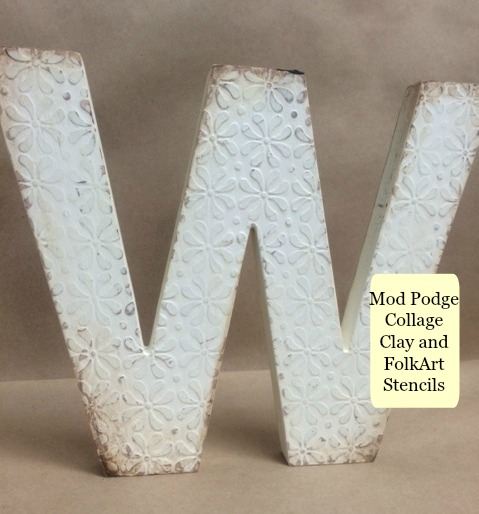
For additional inspiration, here is a wood "W" that I created using exactly the same techniques and colors. This stencil is the FolkArt Home Decor Layered Fleur De Lis stencil. I used only the "pattern" layer of this layered stencil!
And here is a photo of a wood clothespin note holder embellished with Mod Podge Collage Clay on the raw wood. As mentioned earlier, at this stage, the dimensional relief stenciling can be painted, stained or even left alone. Why not try this technique real soon, you will enjoy it!